VA & FHA Approved · Termite & Pest Control · San Diego Versión en Español · Call Today (619) 421 - 2101
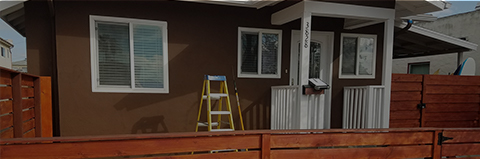
Residential property prepared for a professional termite inspection

Our Termite Inspection Process in San Diego

A clear look at how we inspect attached exterior areas, accessible interiors, subareas, and attics before preparing findings, recommendations, and a property-specific quote.

Versión en Español
Observe first, recommend second

The inspection establishes what is visible, accessible, and appropriate to address

Termite pellets, shelter tubes, discarded wings, damaged wood, staining, or a suspicious soft area can be important clues, but a single clue does not establish the organism, the extent of activity, or the correct treatment. GC Termite Control’s inspection process reviews the visible and accessible evidence before recommending termite treatment methods, monitoring, or corrective work.

Our primary inspector has been a licensed operator since 2008. The process remains practical and consistent: announce the appointment, explain the inspection scope, begin with the attached exterior, inspect available subareas, obtain permission before entering the occupied interior, inspect an available attic, and then explain the findings. The inspection does not rely on a predetermined product or promise that every concealed condition can be seen.

The field visit commonly takes approximately 20 minutes to 1½ hours. Property size, construction, access, attached areas, and the amount of evidence can change that range. Larger homes, commercial structures, and multi-unit properties may take longer, so the published range is an estimate rather than a guaranteed appointment length.

Field orderExterior first
InteriorPermission before entry
InspectionVisible and accessible
Follow-throughReport and recommendations

Have questions about an inspection at your property?

Call (619) 421 - 2101 →
The existing GC workflow

Three connected phases, from arrival to written recommendations

The presentation is new, but the field process is unchanged. The inspector explains two major inspection portions—the attached exterior, followed by the interior and attic when available—then completes the established reporting handoff.

  1. 01 Arrival and scope

    Announce the appointment and explain the inspection

    The inspector knocks and lets the owner or tenant know that GC has arrived. Before beginning, the inspector explains that the inspection starts with attached exterior areas and then moves to the occupied interior and accessible attic, when one is present.

  2. 02 Field inspection

    Review exterior, subarea, interior, and attic evidence

    Accessible exposed exterior wood is evaluated first, including probing where appropriate. An available subarea is inspected before the inspector returns to request interior access. Finished interior surfaces are reviewed visually, and accessible attic framing is inspected when an attic is available.

  3. 03 Findings and report

    Explain observations and send notes to the office

    After the field inspection, the inspector advises the occupant of the observed findings and recommendations. Digital notes go to the central office, where the written report and applicable quote are prepared and sent to the customer for review.

Where the inspection takes place

The two inspection portions, shown area by area

These photographs show the same exterior, subarea, interior, and attic portions described in the original process.

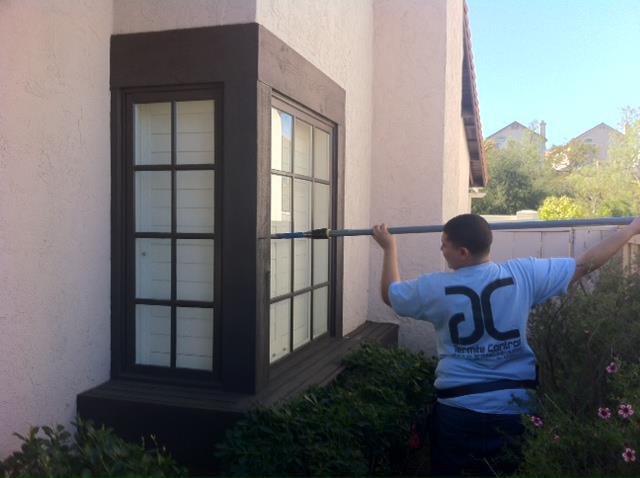
GC Termite Control inspector evaluating exposed exterior wood at a San Diego property 01
Exterior portion

Attached Exterior

The inspector normally begins outside, evaluating accessible exposed wood and visible building conditions. A probing device may be used on exterior wood to assess deterioration, hollow areas, or evidence associated with wood-destroying pests and organisms.

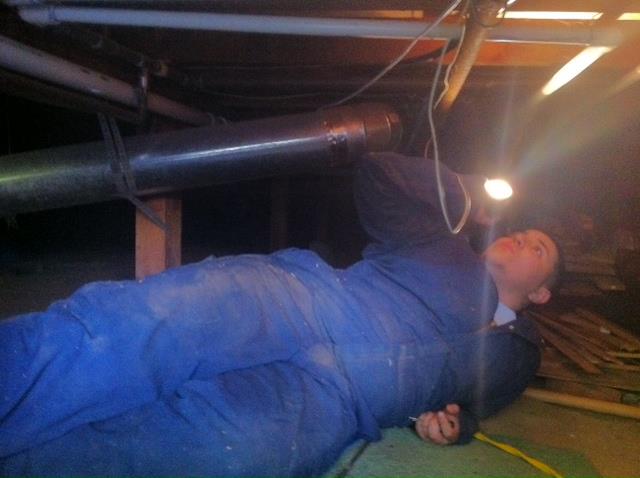
Inspector examining the accessible subarea beneath a property 02
Exterior portion

Accessible Subarea

When a subarea exists and practical access is available, the inspector checks visible framing and surrounding conditions for WDO evidence, water leaks, staining, decay, and other conditions that may affect the report or recommendations.

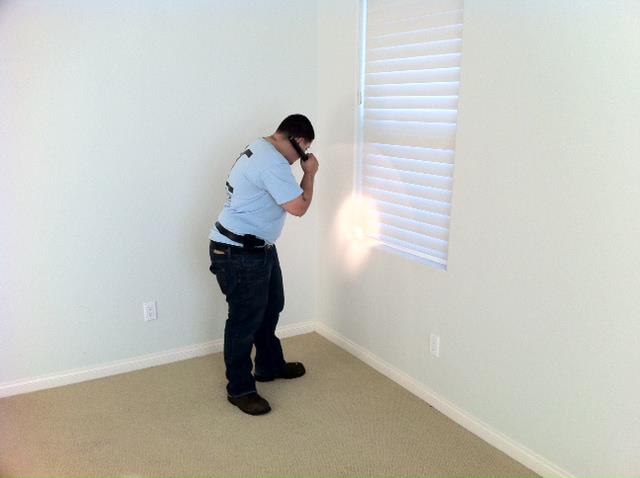
Inspector visually reviewing an interior wall and window area for termite evidence 03
Interior portion

Occupied Interior

After returning to the entrance and obtaining permission, the inspector reviews visible walls, ceilings, floors, trim, and other accessible interior surfaces. Finished interior areas are not probed because the tool could leave cosmetic damage.

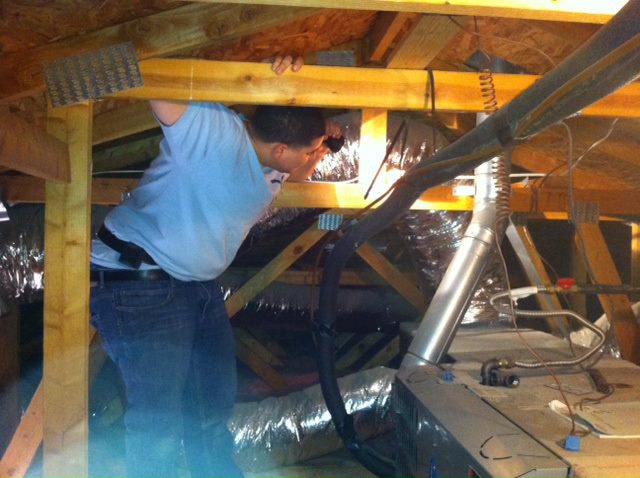
Inspector reviewing accessible rafters and roof framing inside an attic 04
Interior portion

Accessible Attic

If the structure has an attic and it can be entered, accessible rafters, roof sheathing, vents, and structural framing are reviewed for visible evidence. Areas blocked by equipment, storage, construction, or unsafe access remain limited.

Wood-destroying pest and organism clues

What the inspector is evaluating

A WDO inspection is broader than looking for one type of termite. Observations are interpreted together so the report can distinguish visible evidence, damage, conducive conditions, and areas that could not be inspected.

Termite Evidence

Pellets, shelter tubes, discarded wings, swarmers, damaged wood, or other signs that may indicate drywood or subterranean termite activity.

Wood-Boring Beetles

Exit holes, frass, damaged surfaces, or weakened wood that may require identification before a recommendation can be prepared.

Fungi and Dry Rot

Visible fungal growth, staining, decay, softened wood, or other deterioration associated with an infection or moisture condition.

Hollow or Tunneled Wood

Surface changes, hollow areas, galleries, or reduced wood strength that can help the inspector identify where further evaluation is needed.

Leaks and Moisture

Plumbing leaks, water staining, drainage problems, or persistently damp areas that may support fungi, decay, or certain termite conditions.

Concealed Activity Clues

Visible evidence can suggest activity inside wood, walls, roofing assemblies, or other spaces that cannot be fully viewed during the inspection.

Moisture is important, but not for the same reason in every finding

Leaks and excess moisture can support fungi, dry rot, dampwood conditions, and some subterranean-termite access. Drywood termites, however, live in relatively dry above-ground wood and do not require an active leak. Moisture evidence is documented because it can help explain deterioration and guide the appropriate recommendation—not because every WDO depends on wet wood.

Useful inspection boundaries

Visible evidence can guide the next step without revealing every concealed condition

Accessible exterior wood

Probing can help evaluate deterioration

Exterior probing or sounding can help identify softened, hollow, tunneled, or visibly damaged wood. It is used where access and the material allow an appropriate evaluation. The inspection is not a destructive opening of finished assemblies.

  • Supports evaluation of exposed wood and suspicious areas.
  • May reveal damage that is not obvious from color alone.
  • Does not establish what exists beyond inaccessible construction.
Finished interior surfaces

Visual review avoids unnecessary cosmetic marks

Walls, ceilings, floors, trim, and other visible interior surfaces are reviewed for evidence without probing finished areas. If evidence suggests a concealed condition, the report can document the limitation and an appropriate recommendation rather than damaging a room during the standard inspection.

  • Preserves the existing non-probing interior policy.
  • Records visible evidence and practical access limitations.
  • Does not assume a blocked or concealed area is unaffected.
What “visible and accessible” means

Concealed infestations can exist beyond the inspection view

Termites live inside wood and can extend into walls, roofs, framing, or other areas that are not exposed. Storage, insulation, equipment, finishes, construction, height, and unsafe access can also limit the view. The inspection documents observed evidence and relevant limitations; it cannot guarantee that every concealed colony, infection, or damaged member was found.

From field notes to customer decisions

The reporting handoff remains part of the process

The field visit is not the end of the inspection. The observations are transferred to the office so the customer receives written findings and recommendations tied to the property.

  1. 01

    Verbal overview

    The inspector advises the occupant of observed findings and explains the recommendations known at the end of the field visit.

  2. 02

    Digital field notes

    Inspection notes and recommendations are sent to GC’s central office for report preparation.

  3. 03

    Written report and quote

    The office prepares the report from the same findings and includes an applicable quote for GC’s recommended work.

  4. 04

    Customer review

    The report is sent to the customer, and staff remain available to answer questions about findings, recommendations, and scope.

Findings determine the recommendation

No single treatment is selected before the inspection

Visible and accessible findings may support monitoring, localized drywood treatment, subterranean termite control, whole-structure fumigation, or structural repairs. Not every property needs every service, and a quote addresses only the work recommended from the inspection evidence and defined scope.

Common process questions

Termite inspection FAQ

These answers describe GC Termite Control’s existing inspection process. Property construction, access, and evidence can affect what is visible during a specific appointment.

What happens when the inspector arrives?

The inspector knocks and announces the appointment to the owner or tenant. The inspector explains that the attached exterior is inspected first, followed by the interior and accessible attic when available. Work does not begin inside an occupied property without requesting access.

Which exterior and interior areas are inspected?

The process covers visible and accessible attached exterior areas, an available subarea, visible interior walls, ceilings, floors, and trim, and accessible attic rafters, roof sheathing, vents, and framing when an attic exists. Blocked, unsafe, concealed, detached, or otherwise excluded areas are not assumed to be clear.

Why is exposed exterior wood probed but finished interior wood is not?

Probing accessible exterior wood can help identify deterioration or hollow areas. The same tool could leave visible cosmetic marks on finished interior surfaces, so the standard interior portion relies on visual evidence and documents concerns or limitations without damaging the finish.

How long does the inspection usually take?

The existing typical range is approximately 20 minutes to 1½ hours. Size, construction, access, property type, and evidence can extend the visit. Larger houses, commercial structures, and multi-unit properties may take longer, so the range is not a guaranteed duration.

Can an inspection locate every concealed termite infestation?

No visual inspection can promise discovery of every condition inside wood, walls, roofs, or other inaccessible spaces. The inspector evaluates the evidence that can be seen and reached, records relevant limitations, and recommends further action when the visible evidence supports it.

What happens after the field inspection is completed?

The inspector explains observed findings and recommendations to the occupant, then sends digital notes to the central office. The office prepares and sends the written report and applicable quote. Customers can contact GC with questions about the findings or proposed scope.

Start with a professional inspection

Understand the visible evidence before choosing the next step

Schedule an inspection so GC Termite Control can review accessible areas, explain the findings, and prepare recommendations and an applicable quote for your property.

Service area

Areas We Serve

(619) 421-2101